
Want to learn the ins and outs of performing a Rapid Trauma Assessment (RTA)? This vital skill for all EMT and EMS professionals is also invaluable for anybody in compromising emergency medical situations. Learn how to assess unresponsive individuals in the event that you witness or come upon a traumatic accident. A proper RTA can give Emergency Responders critical information when they arrive, and consists of a quick inventory of all the body systems to identify injured ones. Read on or watch the video below.
Rapid Trauma Assessment (RTA) is an essential protocol for every EMT or EMS professional to learn and become an expert in. The RTA is used on major mechanism of injury patients or unconscious patients with an unknown mechanism injury to rapidly obtain a quick inventory of all the body systems that may be injured on your patient.
First, before you arrive on scene, you’ll want to make considerations about the patient’s mechanism of injury, or nature of illness, based on information from the dispatch or from bystanders, as well as from looking around the scene. Using that information you’ll determine if you need additional resources and what kind of spinal precautions you’ll need to take.
REMEMBER:
- BSI (Gloves)
- Scene Safety
- General Impression
- Additional Resources
- C-Spine Stabilization
Just like any assessment, the Rapid Trauma Assessment begins with an assessment of your patient’s mental status. If your patient is responsive, you would ask them questions to determine how alert and oriented they are (A&O 1-4).
REMEMBER, the A&O Scale is: Alert and Oriented to Person, Place, Time, and Event. So a patient who does not remember what happened to them would be considered A&O 3/4. An A&O score of 4/4 would indicate no concerns about the patient's mental status.
If the patient appears to be unresponsive you can start by shaking and yelling—something like "Sir, sir! Hey can you hear me?" This helps establish responsiveness and connection with the patient.
REMEMBER: Determine responsiveness using the AVPU Scale to describe level of consciousness.
- A - Is the patient Alert?
- V - Does the patient respond to Verbal cues?
- P - Does the patient respond to Pain stimulation?
- U - Is the patient completely Unresponsive?
If you don't have any visible or auditory response you should move onto a painful stimulus. Let’s imagine the patient is groaning when you do a sternal rub. That’s excellent feedback about what may be going on. Alternatively, you could pinch the trapezius muscle pretty sharply behind the shoulders.
After you check the patient’s mental status it's time to go into ABCs.
REMEMBER the ABCs:
- Airway
- Breathing
- Circulation
** Circulation comes first in the instance of major, life threatening hemorrhage.
You're in find and fix it mode with this. Any problem you find with the patient's airway, breathing, or circulation you'll fix and manage until it's stable. To assess the patient's ABCs you'll do a visual inspection for major bleeding. You'll also want to inspect the airway to ensure it is patent. Find the center, or distal pulse. Remember to look, listen, and feel for respirations.
After assessing and managing any issue with the ABCs, you'll move on to a full head to toe exam to take a quick inventory of any body system that may be injured. Any injury you find here, you'll expose and inspect as you discover it, but you don't want to treat it yet. You want to see everything that's going on before you make your determination of what needs to be treated, how, and when.
REMEMBER: Treat only apparent life threats (ABCs) when they are discovered.
Performing a full head to toe exam, you'll want to start with the head, inspecting and palpating for DCAP-BTLS:
- Deformities
- Contusions
- Abrasions
- Punctures/Penetrations
- Burns
- Tenderness
- Lacerations
- Swelling
Next we'll check down the neck for JVD (Jugular Vein Distension) or tracheal deviation, check that the eyes are PERRL (Pupils Equal, Round, and Responsive to Light) , as well as the facial muscles. Look in the mouth and nose, ears, palpate down the back, sides, and front of the neck. Check the shoulders and chest wall for instability. You may want to pause here and feel for a breath, looking for frequent breath reps. Then move to the abdomen and palpate all 4 quadrants separately, rocking your palm. NOTE: Start with the core first and save the extremities for last. Finally, examine the pelvis and legs using opposing force to check for instability. NOTE: When you find the source of the injury, (from clear bleeding or the patient telling you directly or through groans of pain/discomfort, for example), you'll expose the injury accordingly. This may mean adjusting clothing or cutting off clothing completely.
Moving on, you'll move to the upper extremities and ending asset CSMs:
- C - Circulation
- S - Sensation
- M - Movement
REMEMBER: An RTA (Rapid Trauma Assessment) should take less than 60 seconds to perform.
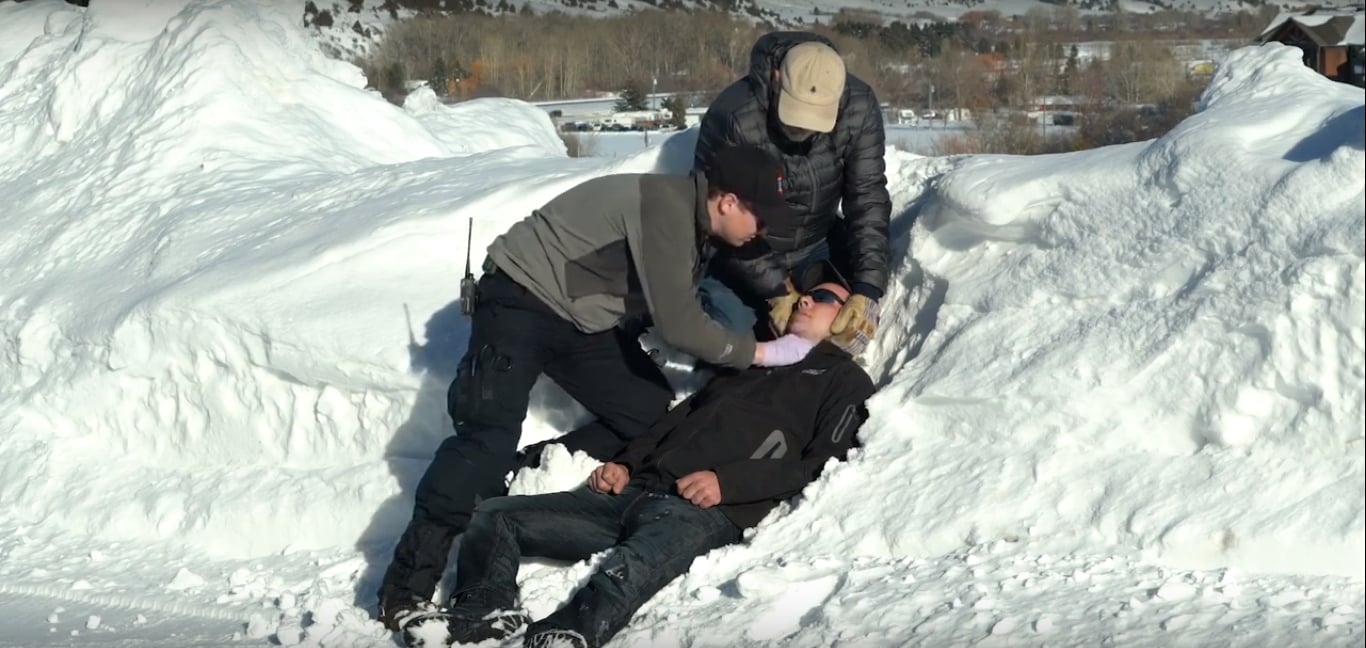
Performing a Full RTA with C-Spine Precaution
Taking into account all the above RTA protocol, performing a full RTA with C-spine precaution should be done with the help of a bystander or partner (See above video at time 3:13 for reference). The partner should maintain C-spine in an inline, neutral position.
You'll want to start with looking at the scalp, then the mouth. Check to see if the pupils are equal and reactive. Check for airway obstructions in the nose and mouth, as well. Look carefully for any C-Spine deviation, instability, or crepitus. Move onto the shoulders, then check to see if the chest is intact. Pay special note to the rise and if there is any indication of extension of the abdomen. Check to see if the patient's pelvis is stable. Moving through this protocol, when a life threatening injury is discovered, expose and inspect accordingly.
REMEMBER: Check CSM (Circulation, Sensory, and Motor functions) bi-laterally to compare.
With practice, (memorizing the RTA protocol, as well as hands-on simulation and real-world application) you will be able to perform this as an expert in no time. If you want to learn this--and much more--from trained Montana EMT and EMS experts, give us a call. (Check out our upcoming EMT courses or EMS refreshers, too). We are crazy passionate about helping you and your teams be prepared for any emergency medical situation!